Prototyping and Testing in the Classroom
Design Thinking is a human-centered approach to solving problems.
Organizations around the world – including IDEO and the Stanford d.school – use Design Thinking to create innovative solutions.
In the classroom, students can use this approach to engage in authentic learning experiences.
While Design Thinking typically consists of 5 key steps – empathize, define, ideate, prototype, and test – we are going to zoom in and focus on prototyping and testing in the classroom.
If you are looking to learn more about Design Thinking in the classroom, start here.
About the Prototype Stage
During the Design Thinking process, students will move through five different phases, beginning with empathizing with the user, defining the problem, and ideating (or brainstorming) potential solutions.
Once students have finished brainstorming, they will then move onto the Prototype stage, and can begin creating their ideas.
In the Prototype stage, students will focus on identifying and building the best solution for the problem or need. Students may need to “research, draft, sketch, and plan” out their ideas (Eduscape).
In the classroom, a prototype can be defined as a first build, or a first draft. This is true of engineers and designers, too!
Oftentimes, engineers and designers use scaled-down versions of a product when creating their prototypes. For example, they might use inexpensive materials, build smaller models, or even create just one specific feature within that product or solution.
According to the Stanford d.school, there are two categories of prototypes: solution-oriented prototypes and empathy-oriented prototypes.
While solution-oriented prototypes test a solution or hypothesis you are exploring, an empathy-oriented prototype instead is designed to “maximize your learning about a person or people” (Stanford d.school).
In some instances, solution- and empathy-oriented prototypes may not be mutually exclusive.
At school, students might build solution- and empathy-oriented prototypes, by:
- Building models of their ideas using maker materials like cardboard
- Bringing their ideas to life digitally with a 3D modeling platform like Tinkercad
- Creating a detailed map or blueprint that outlines a solution to an authentic problem
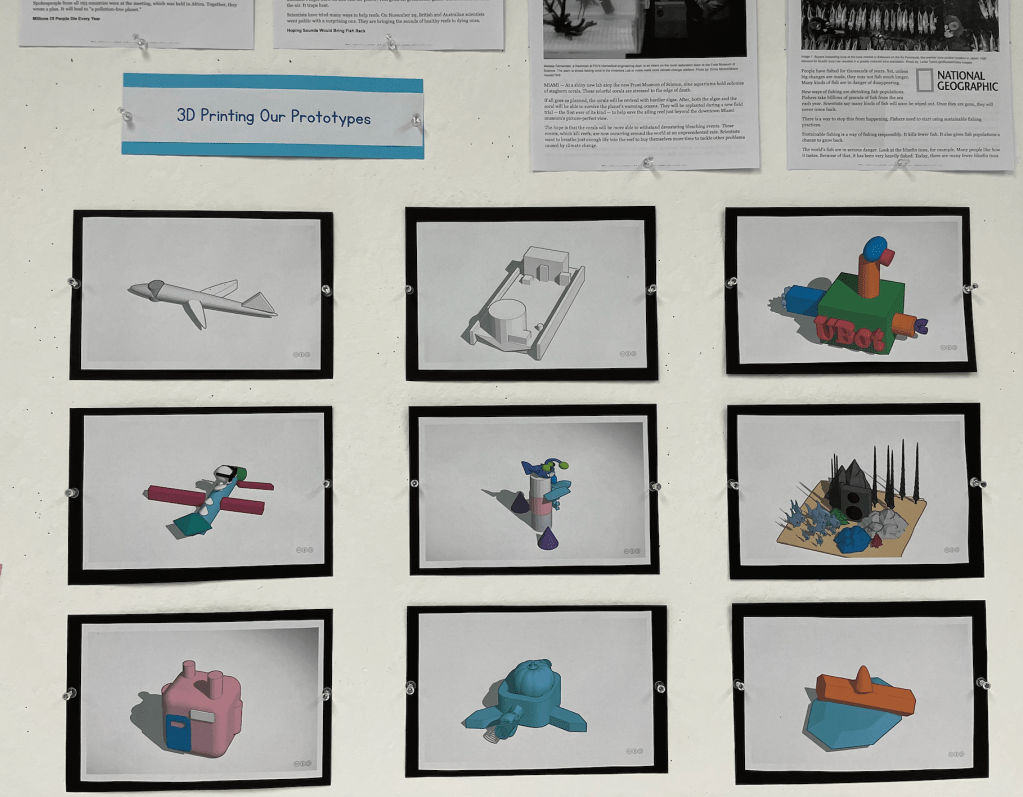
In the image above, 4th grade students created solutions-oriented prototypes to answer the question: How might we help fix a problem in our oceans?
While I did not explicitly use the language “solutions-oriented” with my students, I did remind them throughout the Design Thinking process that our goal was to create solutions that soled a problem.
Learn more about identifying and solving problems in the classroom here.
About the Test Stage
Once students have created their prototypes, they will move onto the final stage of Design Thinking: the Testing phase.
Depending on the topic or medium (as well as different types of prototypes), “testing” may look very different from project-to-project.
To test a solutions-oriented prototype, students will need to examine:
- Who is testing the concept?
- What hypothesis are you testing?
- What are you trying to learn with the prototype?
- What must be true for your concept to work?
- How do people experience the concept in context and not just imagine what it might be like? (d.school)
To test an empathy-oriented prototype, students will need to examine:
- Who is testing the concept?
- What behavior, mindset, or belief are you hoping to better understand?
- What do you want to learn about the person(s)?
- What assumption do you want to test?
- What will the person do to give you insight? (d.school)
In one project, students might test their ideas by presenting their prototypes to the class and receiving feedback. In another, students might actually give their prototype to its intended audience or user. While in a third, students might test to see if their prototype can solve a real-world problem.
Let’s take a look at some specific examples of projects in different grade levels:
- Kindergarteners built prototypes of houses for the Three Little Pigs. To test their houses, we used hair dryers to create the force of wind, which we called the Big Bad Hair Dryer. (solution-oriented)
- 2nd graders designed useful, meaningful gifts for family members based on empathy interviews. To test their prototypes, students gave their prototypes to the family member they interviewed and asked for feedback. (empathy-oriented)
- 4th graders developed and built solutions to better protect our oceans. To test their ideas, students gave a presentation to our entire school community. (solution-oriented)
In other projects, my students have used technology to expand their reach to a larger audience by using tech tools, like creating a website on Google Sites or uploading a PSA-style video to Vimeo.
Learn more about EdTech Tools for Design Thinking.
The Importance of Designing Prototypes, Testing Ideas, and Reflecting
By designing prototypes, students can bring their ideas to life.
By testing their ideas, students can learn from their mistakes and create meaningful projects for authentic audiences.
As a five-step process, Design Thinking also helps students build skills, including learning how to:
- Communicate and define a problem
- Conduct interviews and develop empathy
- Solve real-world problems and practice creativity
- Understand others, the needs of others, and their own place in the world
Prototyping and testing in the classroom gives students an opportunity to be creative.
And best of all, Design Thinking is fun.
Thank You!
Thank you for reading this blog post about prototyping and testing in the classroom. What other ways have you tried out Design Thinking in your classroom? Let me know in the comments below!
Categories
